Category Archives: Recipes

Graham Cracker Crust

Whenever I have made a graham cracker crust using the traditional recipe, the crust always seemed dry, so I made my own adaptations. Here is my recipe:

Ingredients:

  • 1 package graham crackers
  • 1/3 cup sugar
  • 8 tablespoons butter/margarine melted

Directions:

  1. Preheat oven to 375˚
  2. Put butter in an oven safe dish in the oven to melt
  3. Crush the graham crackers in a food processor or by crushing them in a ziploc bag
  4. In a bowl, stir together crushed graham crackers and sugar
  5. After it is completely melted, add melted butter from oven and stir thoroughly (I just mix with my hands to make it easier).
  6. Put crust in the oven and bake for 7 minutes.
  7. Fill with desired pie filling

Banana Bread Recipe

Because of my experience with food allergies, I have learned that you can substitute one banana per egg in many recipes and still get a nice moist texture. Of course some recipes just don’t work with banana (like brownies or pie), but it works great for banana bread (and pancakes too!). Since Phillip is no longer allergic to eggs, I recently decided to make this recipe with eggs instead of the extra bananas. Surprisingly, it was not as good. So now we almost always use twice the amount of bananas to make a most delicious banana bread. Enjoy!!

Ingredients

  • 2 c all purpose flour
  • 1 t baking soda
  • 1/2 t salt
  • 1/2 c margarine or butter
  • 1-1/4 c sugar
  • 2 eggs (or bananas)
  • 1 t vanilla extract
  • 1/3 milk (or soy milk/water)
  • 2 ripe bananas, mashed
  • 1/2 c chopped walnuts (optional)

Directions

  1. Preheat oven to 325 degrees. Grease 9x5x3 inch loaf pan & set aside.
  2. In medium bowl, combine flour, baking soda, & salt. Set aside.
  3. In large bowl, with electric mixer, beat margarine/butter and sugar until light and fluffy. Beat in eggs & vanilla until blended, scraping sides occasionally.
  4. Stir in banana.
  5. Alternately add flour mixture with milk until blended, beginning and ending with flour mixture.
  6. Evenly spoon batter into prepared pan.
  7. Bake 1 hour 20 minutes or until toothpick inserted in center comes out clean.
  8. Cool 10 minutes and remove from pan
  9. Allow to cool completely
  10. Makes 1 loaf

Miracle Diaper Rash Remedy

Several years ago, in a desperate mission to comfort the burn of my infant’s bottom, I did an internet search and found the best solution for diaper rash that I have found yet. First let me clarify that the type of rash she had was a yeast rash from teething. The doctor usually prescribes Nystatin for it, but it doesn’t seem to work for my little ones.

Candice is now cutting molars and seems to be miserable at both ends. Because my children have fair and sensitive skin, it doesn’t take much to cause a rash. I put this mix on her red and raw bottom last night, and the redness was improved by at least 50% this morning!

Here are the instructions for the (not so) “secret” formula:

  1. Clean the diaper area, preferably with a warm wash cloth (wipes can burn).
  2. Place a diaper under the child.
  3. Spread Desitin on the rash until you have a medium thick layer.
  4. Sprinkle baby powder on top of the Desitin and mix it with the Desitin with your finger
  5. Spread a thin layer of Vaseline on top of the powder and mix it in.
  6. Wipe the remaining goop off your finger onto the clean diaper.
  7. Close the diaper and dress as usual.

Now, after you get this on your child, you will think your child should be walking funny with all that goop on his bottom, but believe me, he’ll be much more comfortable by morning. You can use this mix any time of the day, but I see the best results over night.

I would show pictures to prove my point, but I don’t guess that would be appropriate, huh? Not to mention the fact that I didn’t take any! 🙂 Oh well, you’ll just have to take my word for it, or better yet, try it yourself…I mean on your child….that is, if you happen to have a child in the diaper age range. 😐

Sugar, Sugar Everywhere

I have now been on the South Beach diet for a week. One of the parts of this diet is that you are not allowed to have sugar for the first 2 weeks. This has been quite a challenge, not because we just can’t live without sugar, but because sugar is in absolutely everything!

Just for the fun of it, you should start reading the labels at the grocery store just to see how hard it is to find something that is genuinely sugar free.

The biggest shock to us was salad dressing. We looked up and down the aisle of several different stores looking for any salad dressing that did not contain sugar or corn syrup. Even the fat free and light dressings had sugar as an ingredient. We ended up finding one salad dressing that was genuinely sugar free.

The one life saving dressing was Newman’s Own Olive Oil & Vinegar. I am not a big fan of vinegar, but this dressing actually tastes good. I have been eating it daily for a whole week and am not tired of it yet. That is saying something.

Anyone else have experience looking for genuine sugar free products? I’d love to know what you found! Please share! Homemade recipes are allowed too! 🙂

Egg Free Chocolate Chip cookies

Of all the allergies in our family, egg is the hardest to find a substitute for. It is usually easy to substitute for milk because water almost always works. It doesn’t work so well in chocolate milk, but soy milk works for that. I usually use water in recipes and find that the recipe tastes pretty much the same.

With egg, it is a whole different story. They are in everything, and even egg substitutes sometimes have egg in them. I have learned that banana (1 small per egg) works in sweet recipes (if you like a banana flavor).  It is absolutely delicious when substituted in pancakes – better than regular pancakes in my opinion! A mix of vinegar, oil, and water also works in some cases, and so does applesauce. There are actually several substitutes available.

I baked cookies tonight for an upcoming event and wanted to make sure there was something available for Phillip to eat. I have made oatmeal chocolate chip before, but tonight I decided to experiment with chocolate chip. I used this recipe and the texture and flavor was good. They almost had a shortbread flavor to them, but they were very soft. When I compared it to the Toll House recipe, I discovered that the egg free recipe was very similar but had less sugar. If I ever make them again,  I will add about 1/4 cup more of both brown and granulated sugar.

All in all, I call the experiment a success! I am sure Phillip will love them!

White Sauce Recipe

I made green bean casserole over Thanksgiving and several people asked for the recipe for the white sauce I used instead of cream of mushroom soup. I decided to put it on my blog for anyone else who is interested and so I don’t have to hunt for it next time I need it. It will be right here on my trusty blog waiting for me to seek it out! 🙂

This white sauce can be used for several different things besides green bean casserole. I have used it to make turkey pot pie, tuna casserole, and potatoe soup (usually make it thinner for this one).  To give credit where it is due for this yummy sauce, I will tell you that the recipe is not mine. I learned to make it from my sister-in-law, who, of course, learned it from my mother-in-law.

1/2 cup butter/margarine
3/4 cup flour
4 bouillon cubes (or substitute salt)
4 c milk/water

  1. Dissolve bouillon cubes in 1 cup of hot water.
  2. Melt margarine in a saucepan on medium high heat.
  3. Add flour and mix with whisk (quickly before it starts browning)
  4. Add the bouillon and water mix and whisk.
  5. Add remaining 3 cups of water and whisk again.
  6. Heat until thickened stirring occasionally.

Making Pinatas – Part 2

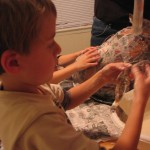
Today I will show you pictures of the newspaper strips, wetting the strips with a paste of flour & water, and putting the strips on the balloon. The kids seemed to have a blast with every step of the pinata-making, but it was most obvious with the newspaper strips!

If you missed Making Pinatas Part 1, feel free to take a moment to catch up.

Italian Chicken

For those of you who didn’t know, my husband is a great cook, especially when he makes his own recipes! Several years ago, he made up a chicken and potato recipe that we call Italian Chicken. It is one of my absolute favorite meals!

In the past, I have called Luke into the kitchen to make the sauce because he had never measured the ingredients, and I didn’t know the recipe. A few days ago we worked together and wrote down the measurements. Now that we know the recipe, we can share it! If you try it, let us know what you think!

Ingredients

  • 1 lb. boneless chicken breast cut into strips
  • Sliced Potatoes
  • 1 c olive oil
  • 1 1/2 cup water
  • 2 1/2 T garlic salt
  • 1/4 c Italian seasoning
  • 1 tsp crushed red pepper

Directions

  1. Preheat oven to 400˚F.
  2. Place the chicken pieces in a 9×13 dish.
  3. Add sliced potatoes until the dish is full.
  4. In a small bowl, mix the remaining ingredients until the water and oil are mixed.
  5. Pour oil and spice mix over the chicken and potatoes.
  6. Bake uncovered for about 1 hour (stirring about half way) or until potatoes are soft and chicken is done.

Which Pumpkin Pie?

Our church is having a pie baking contest next Sunday. Because of this and the fact that Phillip has food allergies, I experimented with egg free, milk free, nut free pumpkin pies over the weekend. First I tried a recipe using gelatin instead of eggs. Then I tried the regular Libby’s pumpkin pie recipe and used one small banana for each egg and homemade evaporated soy milk for the evaporated milk.

The gelatin pie was good, but it really does not taste like pumpkin pie. The Libby’s altered recipe turned out to be pretty good and still had a pumpkin pie flavor. Of course, it is really banana pumpkin pie (with whipped cream on top, of course).

So, the choice Phillip-safe pie to be entered in the pie baking contest is the altered Libby’s pumpkin pie recipe! And the best part? Phillip got to eat his first slice of pumpkin pie!

Foaming Hand Soap

Foaming hand soap is the coolest thing! The kids love to see the bubbly soap squirt out onto their hands, so they want to wash their hands more often just to see the bubblies. I have also read that you can actually save money by using it. The most expensive part is the pump soap dispenser. You can refill your dispenser using your normal liquid hand soap and diluting it with water.

Sounds wonderful! My question is does it make you cheat? When I watch my kids wash their hands with foaming soap at the store, they squirt, play with the bubbles a few seconds, rub for about 2 seconds, and then rinse.

According to the Center for Disease Control and Prevention, you are supposed to lather and rub for at least 20 seconds (long enough to sing “Happy Birthday” twice) before rinsing. Regular liquid soap makes this pretty easy because it is very thick and probably takes about 20 seconds just to get off your hands. With foaming soap, you can put it on your hands and then rinse it off with very little rubbing at all (and that is almost exactly what my kids do). 🙂

So, I guess my question isn’t whether the soap works. The question is, do people actually take long enough washing their hands to make it worthwhile. I know it makes kids want to wash their hands more often because it is so fun. Maybe frequent washing makes up for the lack of time spent washing each time? I am not sure.

So, tell me. Do you think foaming hand soap does the job just as well as liquid hand soap? I would like to hear your opinion. (In other words, please leave me a comment) 😀

If you already use foaming hand soap and think it is a great product, check out recipes for the homemade refill at the blogs of Butterfly Mama and Melanie.

If you aren’t quite sure how to wash your hands and need to see a video, check this out! My only question is, does each person get his own individual towel? If you’re not sure why I asked that question, let me know. 🙂 Meanwhile, go wash your hands….and please use soap. Oh, and don’t forget to wish your mother, brother, or dog (or whoever happens to be nearby), a double happy birthday!